iCEV Tutorial
How to Create a Custom Course
TABLE OF CONTENTS
loading...
Do you prefer to build a course from scratch rather than using a pre-built iCEV course playlist? Follow these steps to build a fully customized course for your needs!
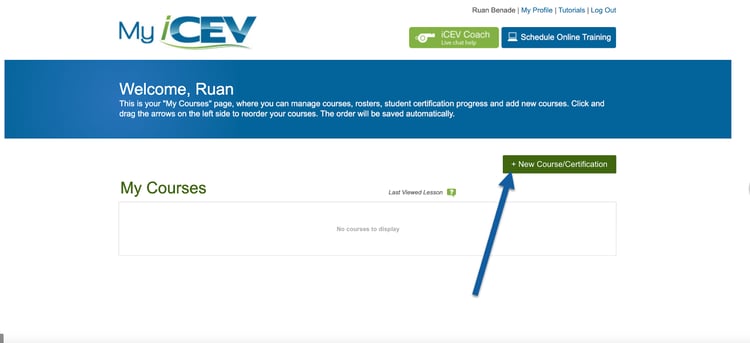
1. Add New Course or Certification
- At the top right of the My Courses page, click the Add +New Course/Certification button
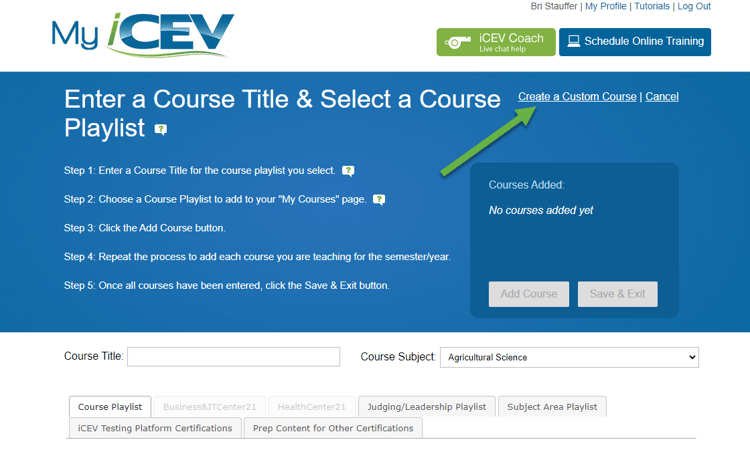
2. Create a Custom Course
- From the course creation page, click the Create a Custom Course link in the top right of the screen.
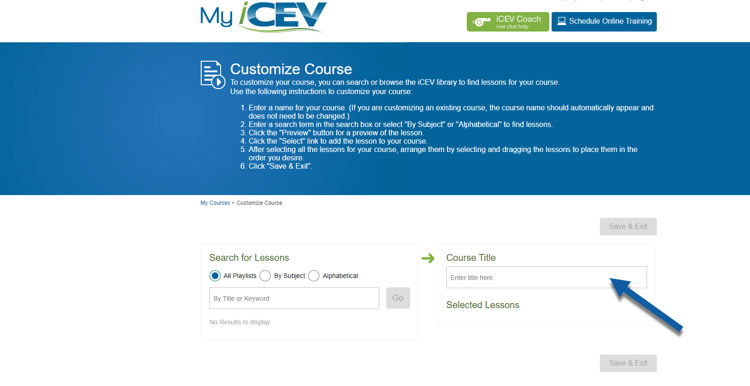
3. Enter a Course Title
- Type the name of your course in the Course Title field. This is how the course will appear on your My Courses page. Example: If you are teaching "Accounting I" in second period, you could name it "2nd Period - Accounting I."
4. Search for Lessons
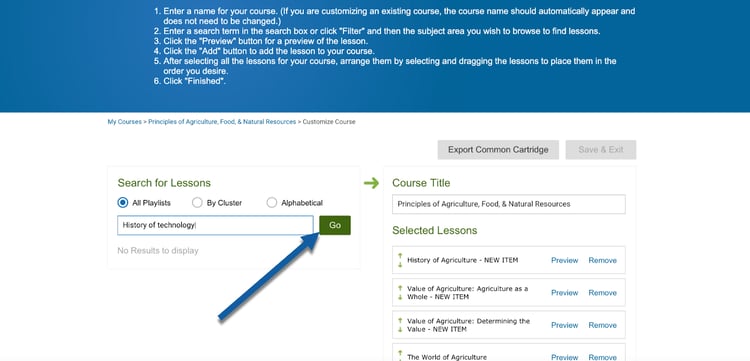
- In the Search for Lessons box on the left, you can search for lessons by All Playlists, By Cluster, or Alphabetically.
- To locate a lesson to include in your course, type a keyword in the By Title or Keyword box
- Click Go
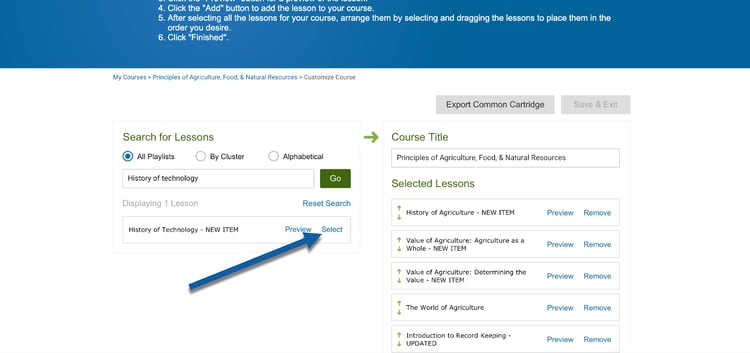
5. Select a Lesson
- After the list of results is shown, you can choose to Preview a lesson to confirm it's what you want to add
- When you are ready, click Select to add the lesson to your course
6. Repeat to Add More Lessons
- If you wan tot add any additional lessons, repeat steps 2-5 to add the remainder of them to your course.
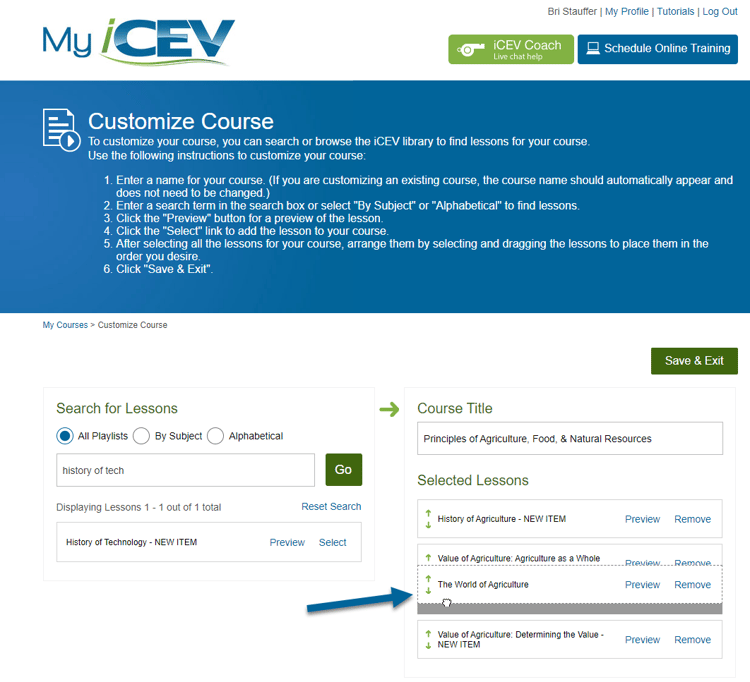
7. Reorder Lessons
- After choosing all of the lessons, you can arrange them by selecting and dragging lessons to place them in your desired order.
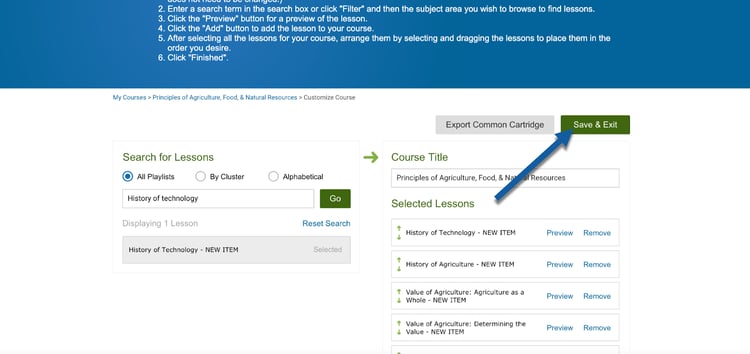
8. Save & Exit
- When you finish adding lessons to your course, click the Save & Exit button on the top-right of the screen.
- Your course will now be visible on the My Courses screen and you can further customize it from there as needed!
We're Here to Help
If you have any questions or need additional support, please contact us using one of the options below:


